21 DIY Living Room Decor Ideas on a Budget
The Ultimate Guide to Budget DIY Living Room Decor Wall Treatments, Art, Accessories, Textiles, Furniture Upcycling & More With Full Instructions.
Why DIY Living Room Decor Is Dominating
Something significant is happening in home decor culture in 2025 and 2026, and Pinterest data is making it impossible to ignore. The direction of travel for years a movement toward minimalism, professional-looking spaces, and the purchasing of designed objects has reversed completely. The most-saved living room content on Pinterest is now overwhelmingly handmade, upcycled, personally crafted, and visibly imperfect in the most beautiful sense of that word.
As a leading trend source confirms: ‘In 2026, the strongest trend is toward handmade imperfection, raw edges, visible stitching, and organic clay shapes this is a direct shift away from mass-produced, perfectly uniform decor. Homes feel more personal and grounded when the objects in them show a human hand.’ Another notes that ‘the mood for 2026 is moving away from overly polished, showroom-perfect schemes in favor of homes that feel collected over time.’ And another: ‘In 2026, bedroom storage is getting smarter and more stylish today’s storage ideas are designed to blend seamlessly into your space while keeping everything effortlessly organized.’
Let us begin.
The 5 Principles That Make DIY Decor Look Professional
1. Colour palette consistency above everything
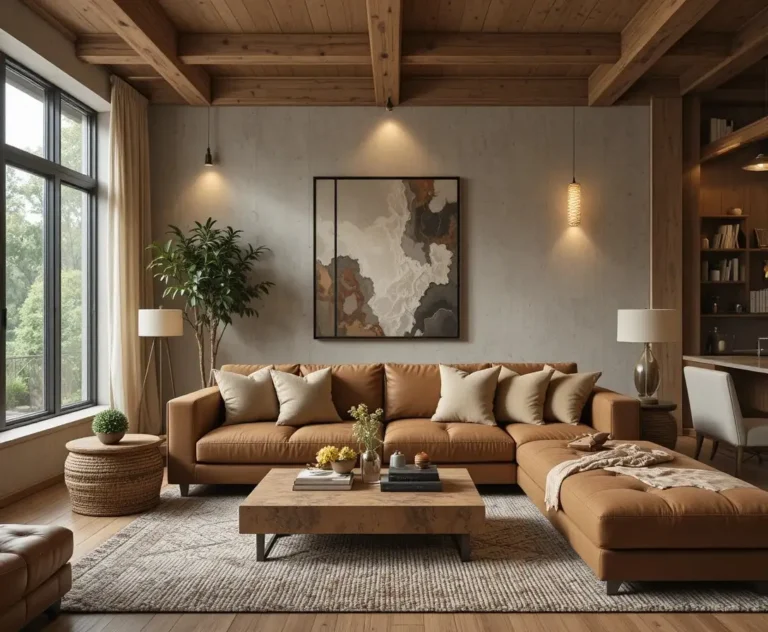
Choose three colours before beginning any project and apply them to every decision. When a cream lime wash wall, terracotta cushion covers, sage green bookcase back panels, and dried botanical arrangements in warm natural tones all share the same palette, the room reads as designed rather than DIY-assembled.
2. Scale appropriately go bigger than feels comfortable
The most common DIY decor mistake is working at too small a scale. A fifteen-centimeter abstract canvas does not work. A ninety-centimeter one does. A small macramé hanging looks like a craft project; a large one looks like gallery art. Always work at the scale the room demands.
3. Finish every project completely
An unfinished edge, an unpainted nail hole, a trim that is not quite straight these details are what distinguish a DIY project from a professional result. The final five percent of finishing time produces fifty percent of the quality difference between amateur and professional outcomes.
4. Invest in quality materials for the visible elements
The paint that will be seen every day deserves a quality product. The fabric for the cushion cover that sits on the sofa deserves a genuine linen rather than a synthetic blend. Saving money on materials that are invisible is sensible; saving it on materials that are the focal point of the project undermines the entire effort.
5. Let negative space work
Every styled shelf, every wall arrangement, and every accessory vignette looks more professional with more empty space around it than feels comfortable. The empty space is not wasted, it gives the objects that occupy the room breathing room and the visual respect they deserve.
Essential DIY Toolkit: What You Need Before You Begin
Most of the projects in this guide require only a small number of basic tools. Before beginning, ensure you have:
- Paint: chalk paint and/or standard emulsion in the chosen palette colours, plus a small tin of floor paint for the stenciled floor project
- Brushes: a set of artist’s brushes in multiple sizes, a wide wall brush, and a small roller for paint application
- Adhesives: PVA glue, spray adhesive, fabric glue, and a hot glue gun with glue sticks
- Cutting tools: a sharp craft knife and cutting mat, scissors, and a miter box with fine-tooth saw for the picture frame molding
- Measuring tools: a measuring tape, a steel ruler, a spirit level, and pencils for marking
- Surface protection: painter’s tape, dust sheets, and sandpaper in medium and fine grits
- Finishing materials: clear furniture wax, polyurethane varnish for floor projects, and wood filler for moulding joints
The 21 DIY Living Room Decor Projects
1. DIY Picture Frame Wall Molding: A $30 Trick That Looks Like a £3,000 Renovation
Budget: $20–$40 | Difficulty: Beginner–Intermediate | Time: 1 weekend
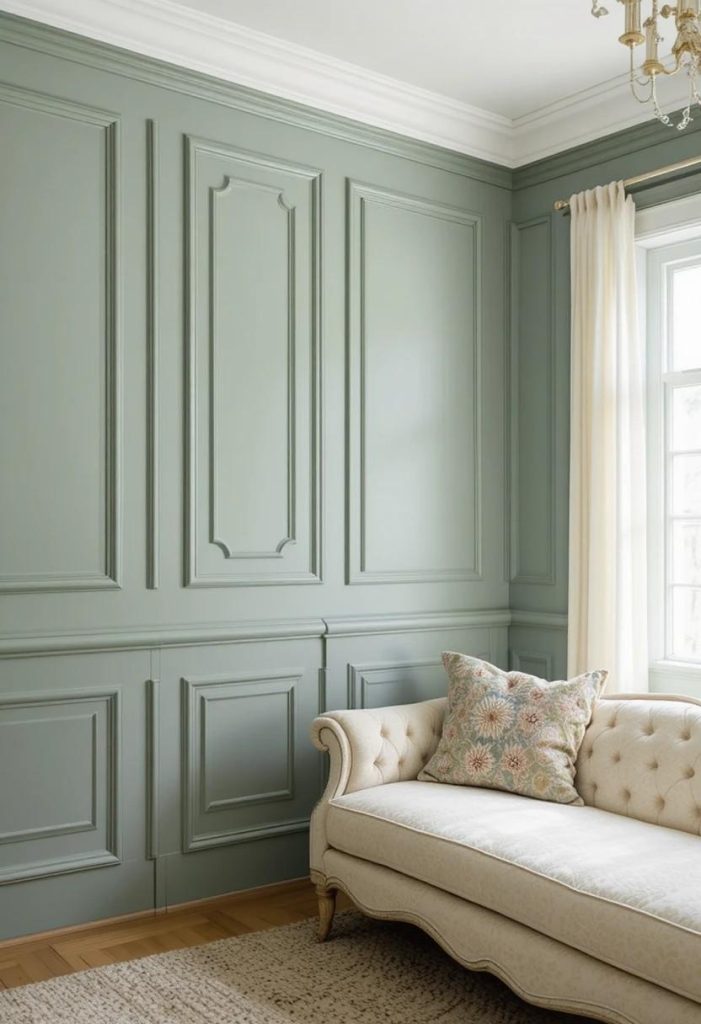
Picture frame wall molding, the technique of applying thin wooden strips to a wall surface in rectangular or square panel formations is perhaps the single most dramatic and most cost-effective DIY living room transformation available. When a wall is treated with evenly spaced rectangular molding panels, it instantly reads as a bespoke, architecturally detailed surface that suggests either the craftsmanship of a Victorian townhouse or the considered design intent of a high-end interior designer. Visitors consistently assume that molded walls represent a significant professional renovation investment; in reality, the materials cost twenty to forty dollars and the installation requires one weekend, a mitre box, wood glue, and a nail gun or strong adhesive.
Style tip: When planning the molding panel layout, leave a slightly larger margin at the bottom of each panel than at the top the human eye perceives equal-margined panels as top-heavy. A margin ratio of approximately 1.1 to 1 (bottom to top) creates a panel that reads as optically balanced.
2. DIY Limewash Paint Technique: Designer Wall Texture for $25
Budget: $15–$35 | Difficulty: Beginner | Time: Half a day
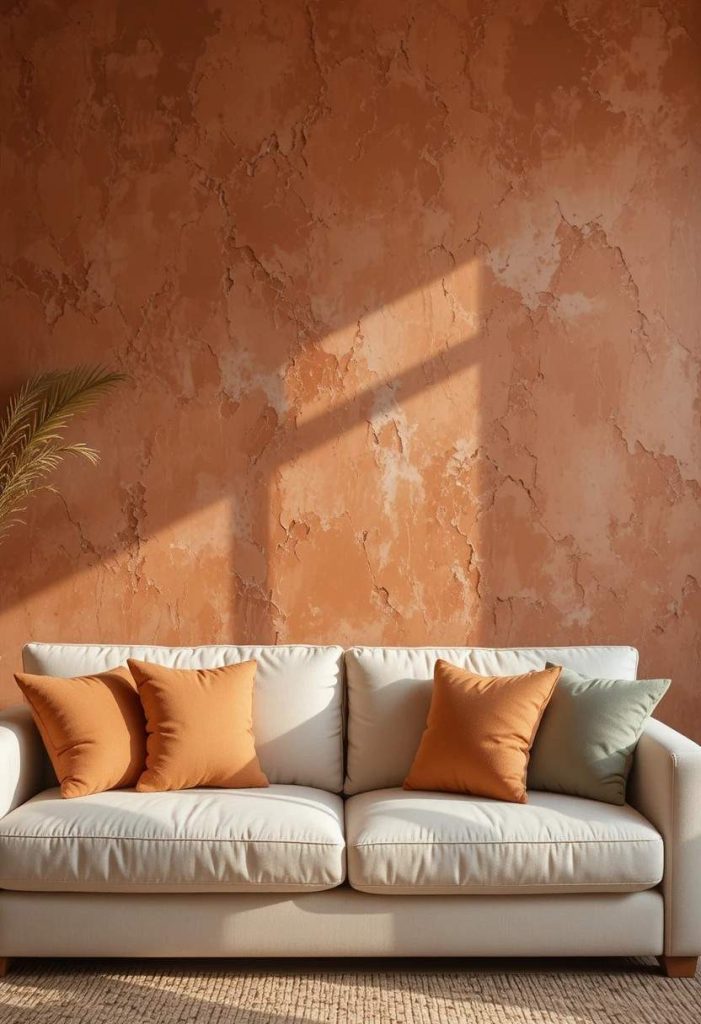
Limewash paint the chalky, slightly uneven, cloud-like wall finish that creates the impression of ancient plaster weathered by time and light is one of the most coveted interior paint techniques in contemporary design, and one that has historically been associated with either expensive specialist applications or costly specialist paints. The DIY limewash technique, using diluted chalk paint or dedicated limewash-effect paint applied with a wide brush in overlapping, irregular strokes, replicates this beautiful textural effect at a fraction of the professional cost and in a fraction of the professional time.
Style tip: Apply DIY limewash in two layers the first layer relatively thin and uneven, the second layer applied over the dry first layer in a slightly different direction with even more diluted paint. The two-layer approach creates greater depth of texture and makes the final result look significantly more considered and professional than a single-layer application.
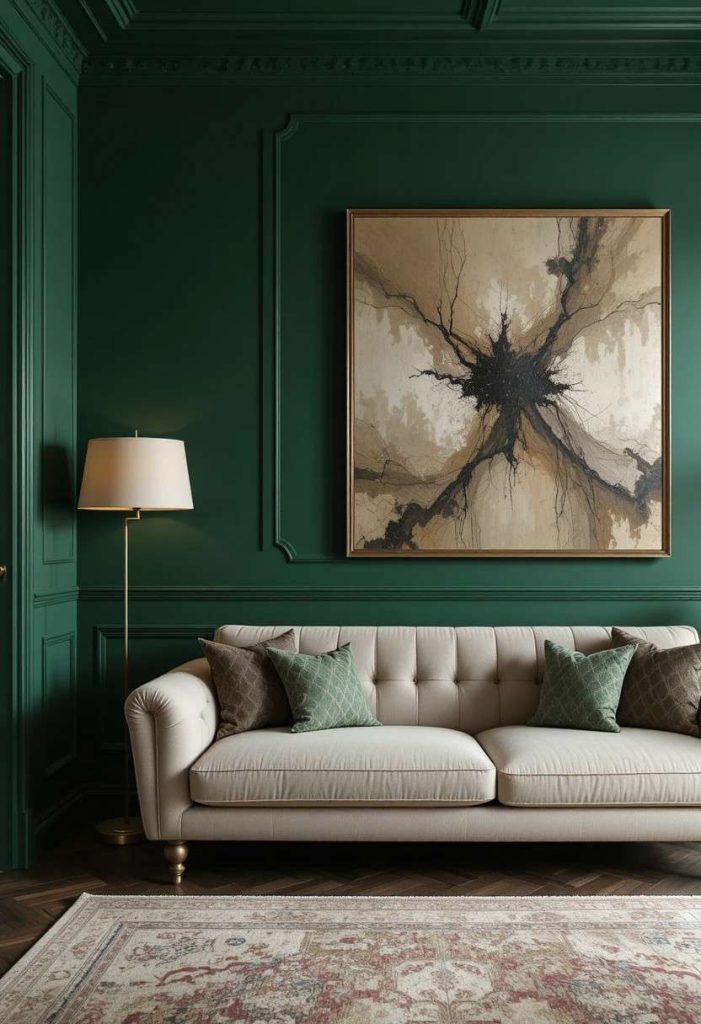
3. DIY Oversized Abstract Canvas Art: Original Artwork for Under $40
Budget: $25–$50 | Difficulty: Beginner | Time: 2–3 hours
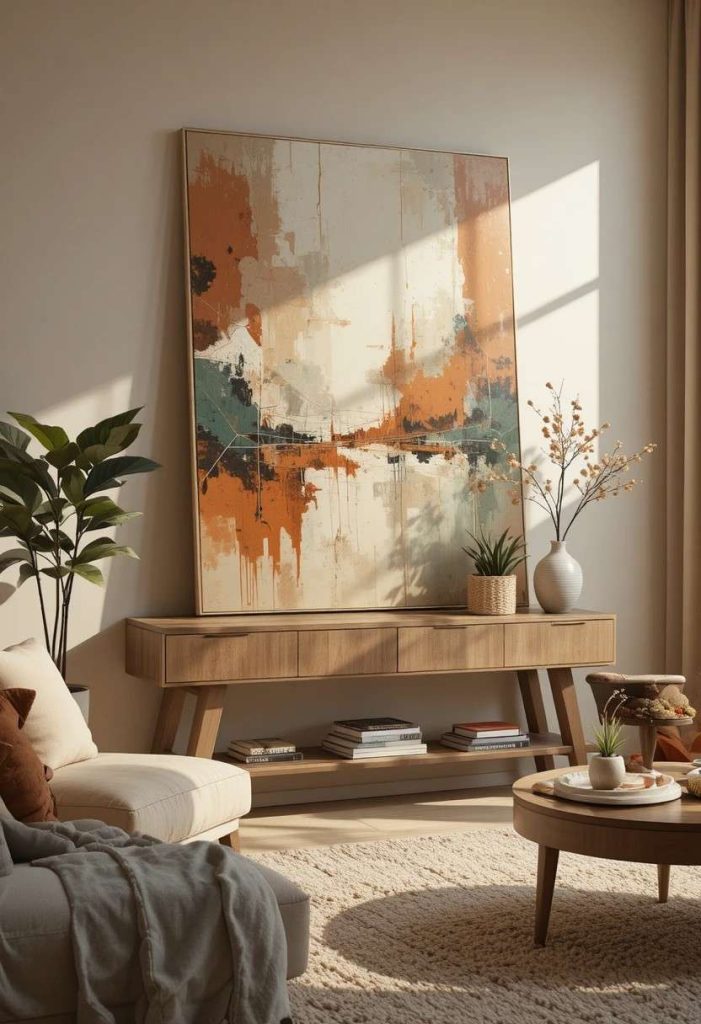
Large-format original artwork is one of the most powerful living room design elements available but the price of genuinely large original pieces from galleries and online art markets places them out of reach for most budgets. The DIY oversized abstract canvas resolves this completely: using a large artist’s canvas (available from art supply stores for ten to twenty dollars), acrylic paints in the colours of the room’s palette, and a set of large flat brushes, it is entirely possible to create a piece of living room artwork that reads, from across the room, as a genuinely considered original and that serves the same spatial and visual functions as a purchased piece at ten to twenty times the price.
Style tip: Begin the abstract canvas by applying a warm golden or terracotta base coat over the entire canvas allow drying then applying the main palette colours over this warm base. The warm undertone visible where the subsequent layers thin out or where marks leave gaps gives the finished piece a cohesive warmth and depth that is difficult to achieve without a toned ground.
4. DIY Concrete-Effect Vases and Vessels: Designer Accessories for $5
Budget: $3–$10 | Difficulty: Beginner | Time: 1–2 hours (plus drying time)
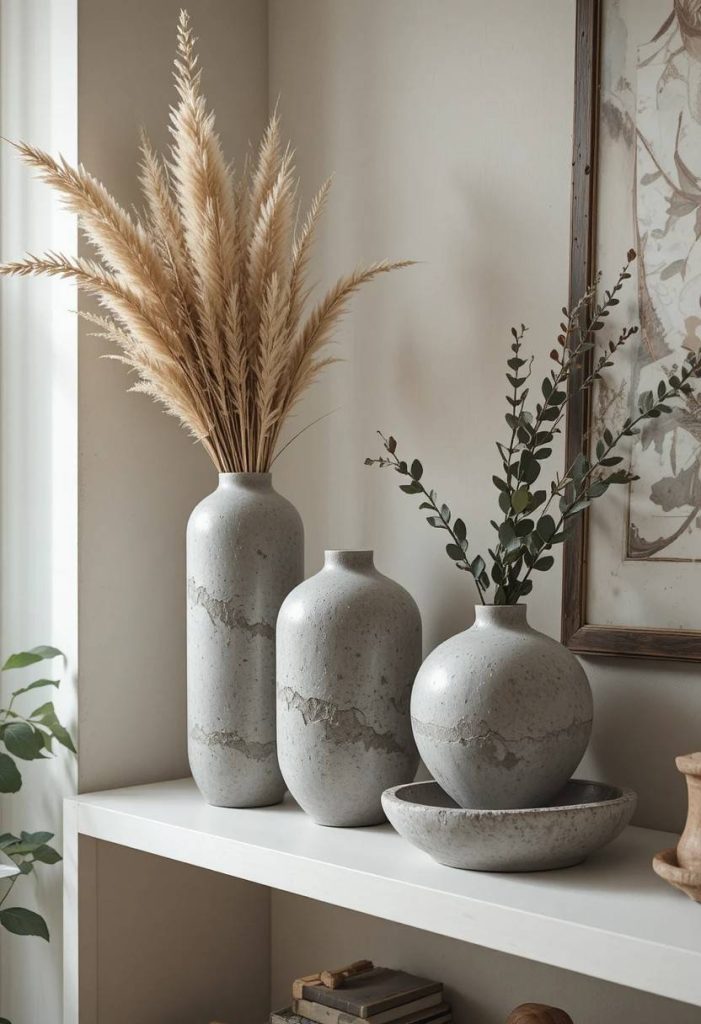
Concrete and stone-effect accessories vases, bowls, candle holders, and sculptural objects are among the most consistently popular and most expensive living room accessories in contemporary design retail. The look is coveted for its raw, organic quality: the cool grey tone, the slightly rough surface texture, and the weighty, grounded appearance that makes any botanical arrangement placed within look genuinely beautiful. The DIY concrete-effect technique replicates this look on any existing vessel a glass jar, a terracotta pot, a ceramic vase, a cardboard tube using a simple mix of PVA glue and cement powder or concrete-effect paint, applied and textured with a brush or sponge to create a surface that reads, from any reasonable distance, as genuine poured concrete.
Style tip: Make a collection of concrete-effect vessels in three different sizes a tall narrow vase, a medium round bowl, and a small low dish rather than a single piece. A grouped collection of three coordinating pieces reads as a considered interior design decision; a single piece reads as a standalone accessory.
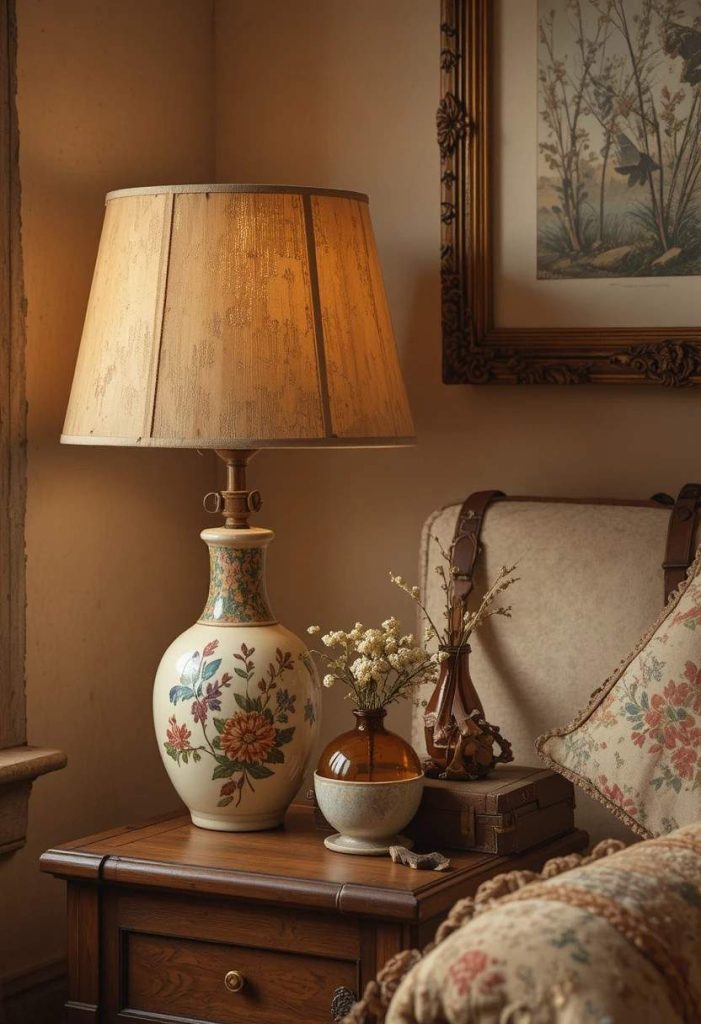
5. DIY Fabric-Wrapped Lampshade: Transform a Basic Lamp Into a Statement Piece
Budget: $10–$25 | Difficulty: Beginner | Time: 1–2 hours
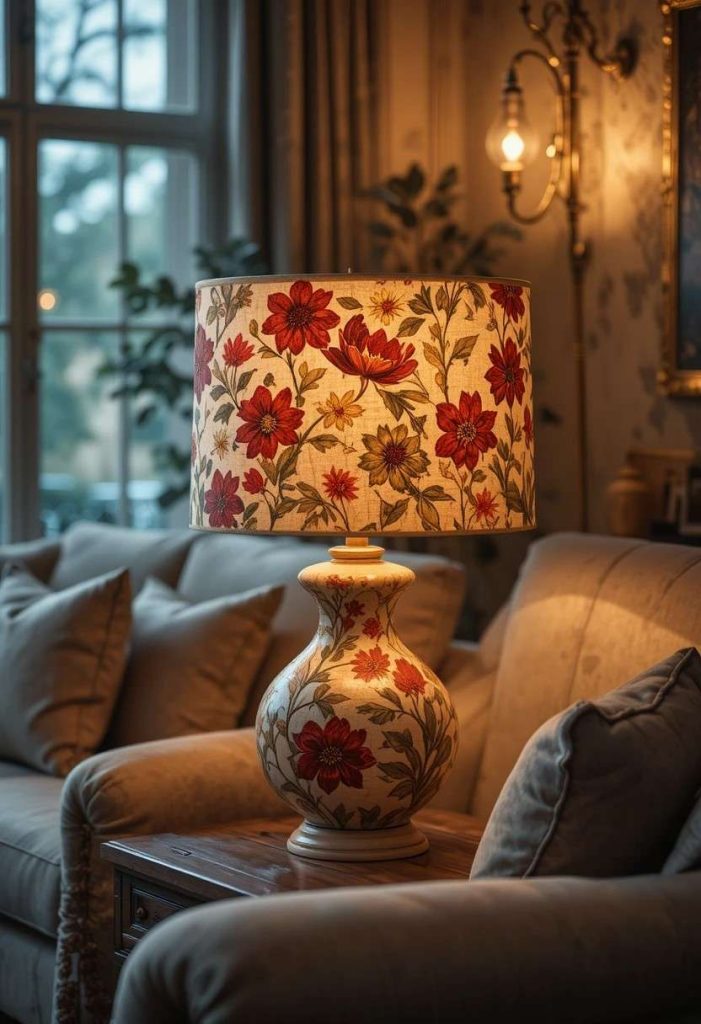
The lampshade is one of the most visible and most impactful accessories in a living room positioned at eye level when seated, it is among the first decorative details noticed on entering the room and among those most frequently remarked upon by visitors. A basic or dated lampshade can undermine the quality of an otherwise well-designed living room; a beautifully covered lampshade can elevate a basic lamp base into a genuine design statement. The DIY fabric-wrapped lampshade technique transforms any existing drum or empire shade in under two hours, using a fabric remnant in a pattern or colour that contributes directly to the room’s palette.
Style tip: Add a trim to the top and bottom rim of the fabric-covered shade using a length of ribbon, woven tape, or decorative fringe in a complementary colour the addition of a trim conceals any slight imperfections in the fabric edge finish and elevates the result from craft project to interior accessory quality.
designer-quality lighting that matches room palette
6. DIY Macrame Wall Hanging: Handmade Textile Art That Elevates Any Wall
Budget: $15–$30 | Difficulty: Beginner | Time: 3–5 hours
Macrame wall hangings handcrafted textile pieces made from knotted natural cotton rope occupy a unique position in the living room decor landscape: they are simultaneously functional artworks (filling wall space with genuine visual interest), handmade objects (communicating craft, patience, and personal investment), and natural material pieces (adding the organic warmth of undyed cotton to a room that might otherwise rely entirely on hard surfaces and synthetic fabrics). A large macrame wall hanging above the sofa or console table is among the most-saved DIY living room decor categories on Pinterest for precisely this combination of qualities.
Style tip: Before beginning any macrame project, cut all rope lengths to the required measurements and group them in labelled bundles lengths typically need to be four to six times the finished length of the piece to accommodate the material consumed in knotting. Having all lengths pre-cut prevents interruptions mid-project and significantly reduces the risk of running out of rope.
7. DIY Painted Gallery Wall: Free Art Plus $15 in Frames Equals Designer Impact
Budget: $10–$30 | Difficulty: Beginner | Time: Half a day
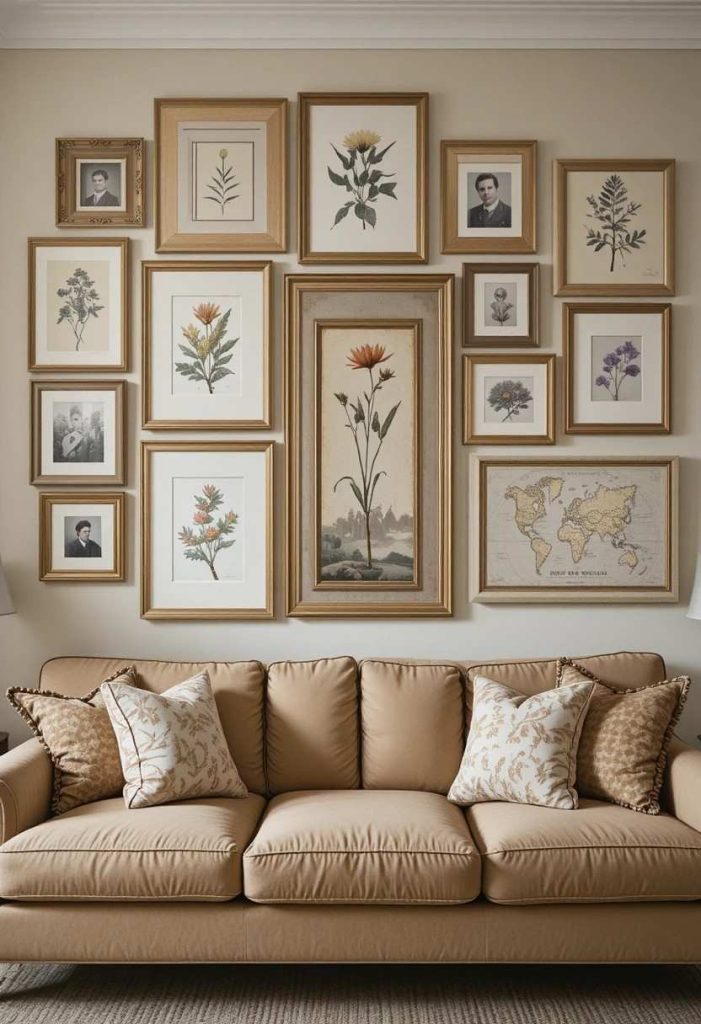
The gallery wall is the living room’s most powerful personalisation tool, and the DIY gallery wall using free public domain artwork, personally significant photographs, the homeowner’s own drawings or paintings, and inexpensive frames unified by a coat of chalk paint creates a display of extraordinary visual impact and genuine personal meaning at a cost that rarely exceeds thirty dollars in materials. The principle is that the content of the gallery wall is far more important than the origin of the frames or the retail cost of the prints, and that a cohesive, thoughtfully curated collection of personally meaningful images in coordinated frames will always outperform a random collection of expensive prints in mismatched frames.
Style tip: Include at least one genuinely oversized piece in the gallery wall a frame that is significantly larger than any other in the collection, positioned near the centre of the arrangement. This anchor piece gives the gallery wall a hierarchy and visual confidence that prevents it from reading as a scattered collection of equal-weight pieces.
8. DIY Clay and Air-Dry Ceramic Accessories: Organic Sculptures for $8
Budget: $5–$15 | Difficulty: Beginner | Time: 1–2 hours per piece (plus 24–48h drying)
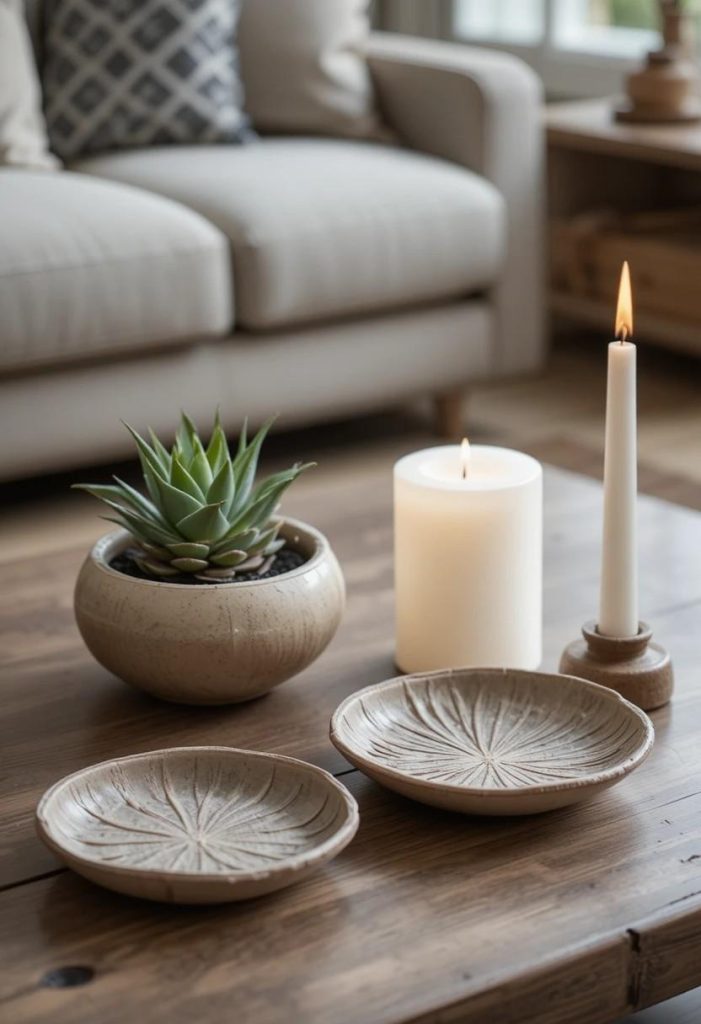
Air-dry clay has become one of the most popular DIY home decor materials of 2025 and 2026, and for very good reason. It is extraordinarily inexpensive, requires no specialist tools, produces beautiful organic results even in the hands of complete beginners, and creates accessories with a handmade, imperfect quality that is precisely the aesthetic quality most valued in contemporary interior design. As one design source confirms: ‘In 2026, the strongest trend is toward handmade imperfection, raw edges, visible stitching, and organic clay shapes this is a direct shift away from mass-produced, perfectly uniform decor.’ Air-dry clay is the single most accessible medium for participating in this shift.
Style tip: When creating textured surfaces on air-dry clay, use natural objects rather than commercial texture stamps a eucalyptus leaf pressed into the wet clay, a lace remnant rolled into the surface, a length of rope pressed and removed for the most organic, authentic-looking texture that communicates genuine handcraft quality.
9. DIY Pampas Grass and Dried Botanical Arrangement: Organic Luxury for $15
Budget: $10–$25 | Difficulty: Beginner | Time: 30 minutes
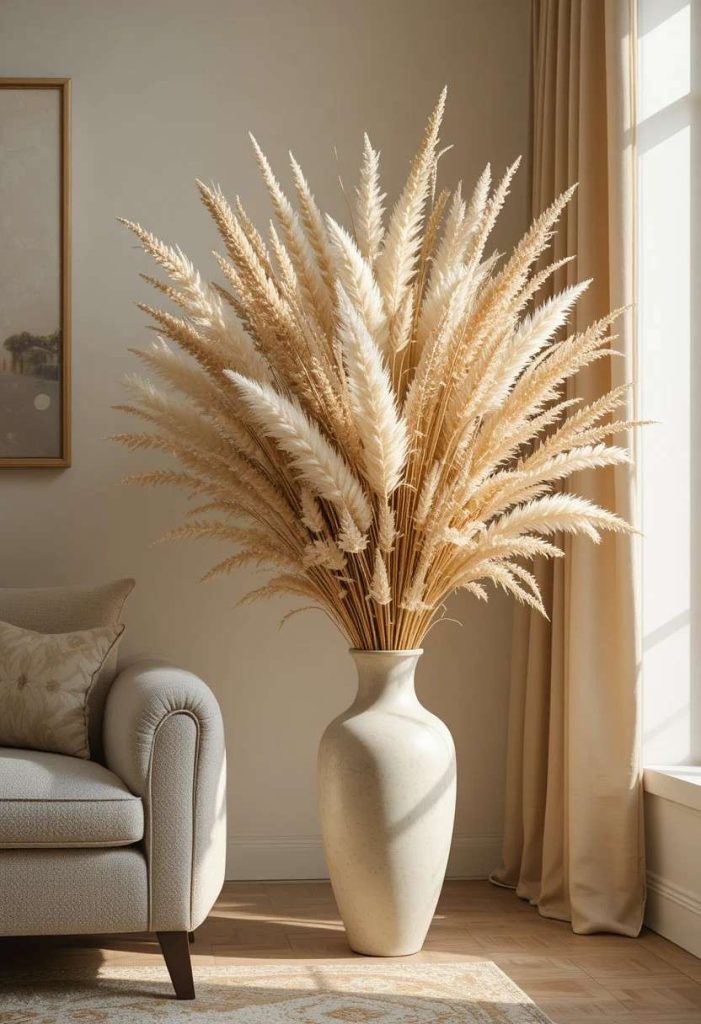
Dried botanical arrangements particularly those featuring pampas grass, dried lunaria (honesty), bunny tail grass, preserved eucalyptus, dried wildflowers, and cotton stems have dominated the living room decor market for several years and remain among the most consistently saved and most widely recreated living room styling ideas on Pinterest. The appeal is clear: dried botanicals have an organic, naturally beautiful quality that brings warmth and life to a room without the maintenance requirement of fresh flowers or the slightly artificial quality of faux alternatives. They are also, when sourced correctly, extremely affordable and the DIY arrangement of dried botanicals requires no skill beyond an eye for proportion and a sense of composition.
Style tip: Arrange dried botanical displays in groups of odd numbers three stems in a small vessel, five in a medium one, seven in a large floor-standing arrangement and vary the heights within each group so that some stems stand above others by ten to twenty centimetres. The height variation creates a more organic, naturally arranged appearance than stems cut to identical lengths.
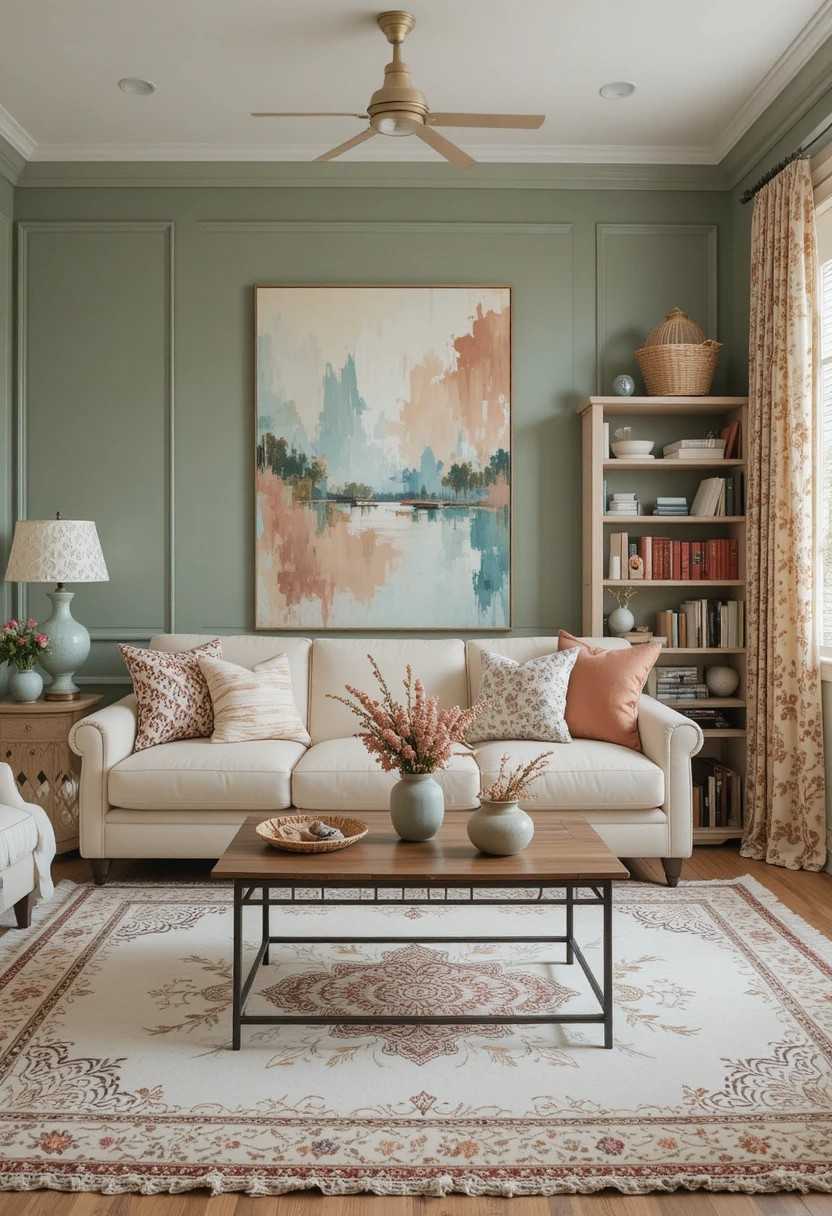
10. DIY Bookcase Styling Transformation: Turning Storage Into a Design Feature
Budget: $0–$20 (using existing items) | Difficulty: Beginner | Time: 2–3 hours
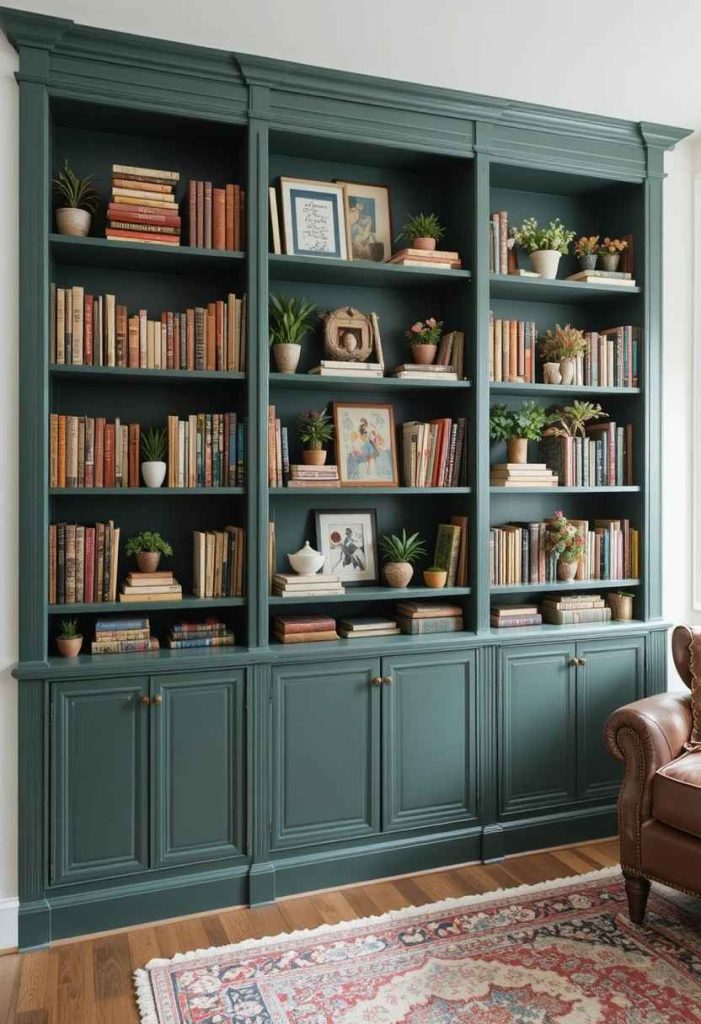
A bookcase styled with genuine design intention is one of the living room’s most characterful and most personal features a three-dimensional display that communicates aesthetic sensibility, intellectual interests, and material taste simultaneously. An unstyled bookcase, crammed with books of every size and colour arranged with no visual consideration, is one of the living room’s most significant visual liabilities: a wall of visual noise that undermines the calm and intention of everything else in the room. The transformation from the latter to the former requires no purchase of new items in most cases only the editorial discipline to remove what does not belong and the compositional eye to rearrange what remains.
Style tip: Remove the dust jackets from all hardback books before styling the bookcase the cloth covers beneath are almost universally more beautiful, more varied in colour, and more interesting in texture than the printed jackets over them. Their removal is free and immediately improves the visual quality of any book display.
11. DIY Woven Rattan Tray Styling: A $12 Accessory That Elevates Every Surface
Budget: $8–$20 | Difficulty: Beginner | Time: 30 minutes
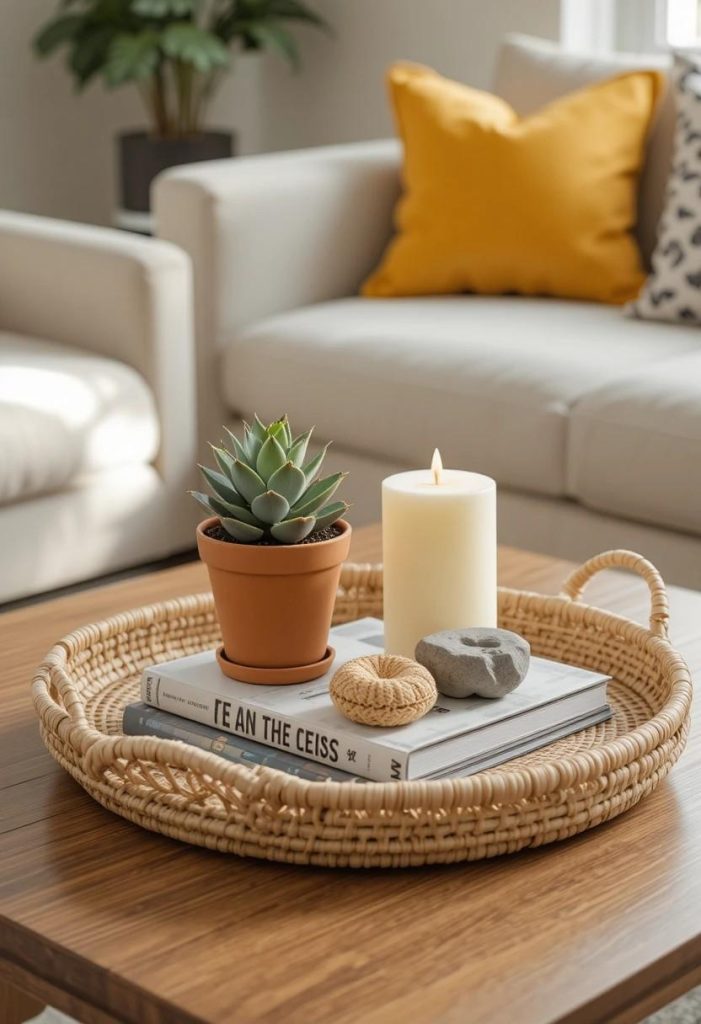
The styled tray is one of the most widely used and most consistently effective living room accessory techniques in professional interior design a containment strategy that transforms a collection of miscellaneous surface items (remotes, candles, small plants, books) into a composed, defined vignette that reads as an intentional decorative display rather than a surface accumulation. A natural rattan or seagrass tray in particular one of the most universally loved and most affordable home accessories available adds organic texture and a natural warmth to any surface it occupies while simultaneously creating the visual boundary that distinguishes a styled arrangement from a random collection.
Style tip: Use a tray as a daily-use tool as well as a decorative one the items used most frequently in a living room (remote controls, hand cream, reading glasses, a candle lighter) can be contained in a tray on the coffee table in a way that keeps them accessible and visible while maintaining the surface’s visual quality. Function and beauty, achieved simultaneously.
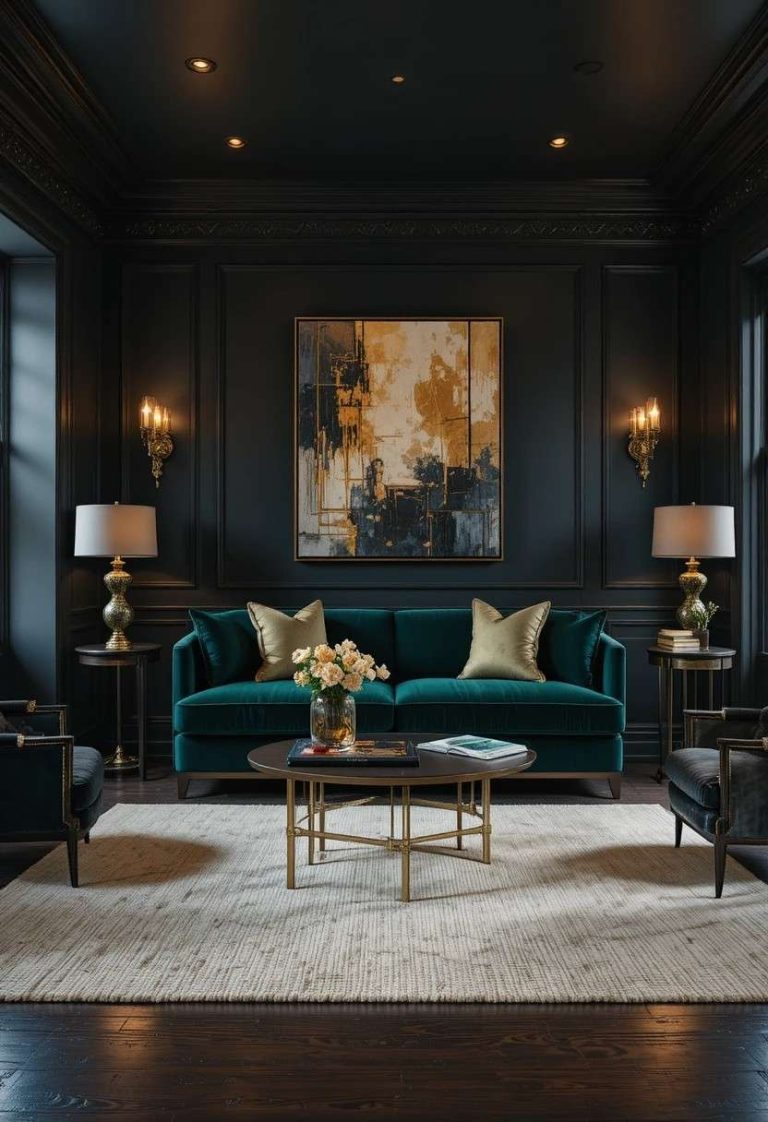
12. DIY Colour-Drenched Accent Wall: Bold Transformation in One Afternoon
Budget: $20–$45 | Difficulty: Beginner | Time: 1 afternoon
The colour-drenched accent wall where a single wall of the living room is painted in a deep, saturated colour from skirting board to ceiling, including the coving and any architectural details is one of the most impactful and most time-efficient DIY living room transformations available. Unlike a full-room repaint, a single accent wall can be completed in a single afternoon with a standard paint roller, a small brush for edges, and a single tin of paint. The result, however, is dramatically disproportionate to the time and material investment: the room’s entire character and aesthetic identity can be established by this single painted wall, which becomes the focal point around which all furniture and accessories are oriented.
Style tip: After painting a deep-coloured accent wall, wait forty-eight hours before adding any accessories or hanging any artwork deep paints continue to dry and alter in tone for up to forty-eight hours after application, and final colour decisions made against the fully dry paint are significantly more reliable than those made against wet paint.
13. DIY Upcycled Coffee Table: Transforming a Thrift Find Into a Designer Centrepiece
Budget: $15–$45 (excluding base piece) | Difficulty: Beginner–Intermediate | Time: One weekend
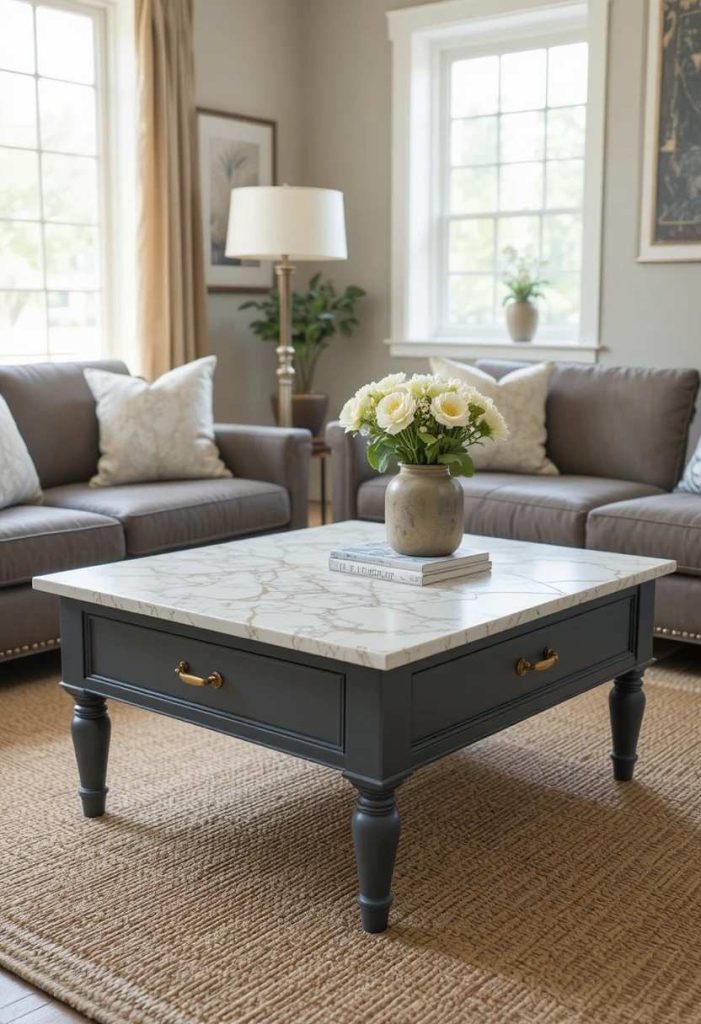
The coffee table is the visual centrepiece of the living room seating arrangement the piece around which all furniture is oriented, on which the room’s most composed styling vignette sits, and from which the room’s aesthetic quality radiates outward. An ugly, dated, or uninspiring coffee table undermines the visual quality of everything around it; a beautiful one elevates the entire seating arrangement. The DIY upcycled coffee table a second hand or donated piece transformed through painting, surface application, and hardware replacement provides a genuinely beautiful coffee table at a fraction of retail cost and with the additional value of individual character that no new mass-produced piece can replicate.
Style tip: After upcycling a coffee table with chalk paint, apply a coat of clear furniture wax with a soft cloth using circular motions and buff to a low sheen. The wax protects the chalk paint from daily surface use, prevents marking from cups and glasses, and gives the finish a slightly polished quality that elevates it from matte craft-paint to genuine furniture-quality finish.
14. DIY Printed Cushion Covers: Custom Textiles That Look Bespoke
Budget: $10–$25 | Difficulty: Beginner | Time: 1–2 hours
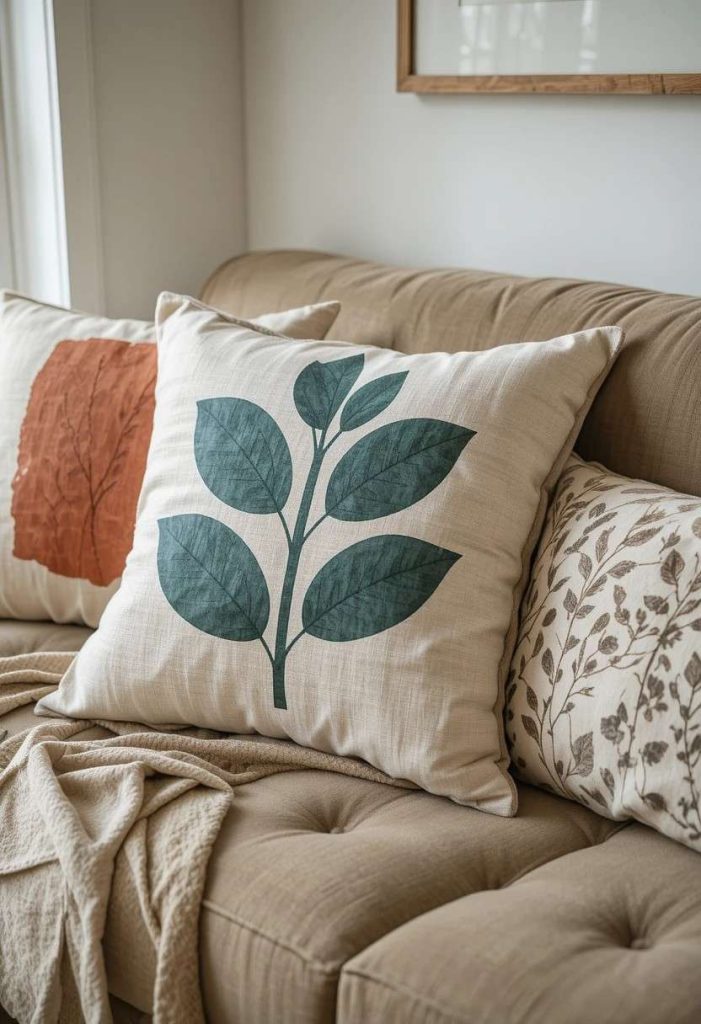
Cushion covers are the living room’s most immediate and most frequently changed textile accessory they transform a sofa’s visual character instantly, introduce the season’s palette update, and contribute more to the room’s aesthetic impression in photographs than almost any other single accessory. The DIY printed cushion cover technique using fabric paint, a stencil, and a plain linen or canvas cushion cover creates custom-printed textiles of genuinely beautiful quality for under fifteen dollars per cover, allowing the homeowner to create a completely bespoke cushion collection in exactly the colours, patterns, and scale required to coordinate perfectly with the room’s specific palette.
Style tip: When printing multiple cushion covers for a sofa arrangement, print each cover with the same motif but vary the scale the same botanical leaf motif at ten centimetres on one cover, fifteen centimeters on another, and five centimeters as a scattered repeat on a third creates a family of coordinating covers that reads as a designed collection rather than an accidentally matching set.
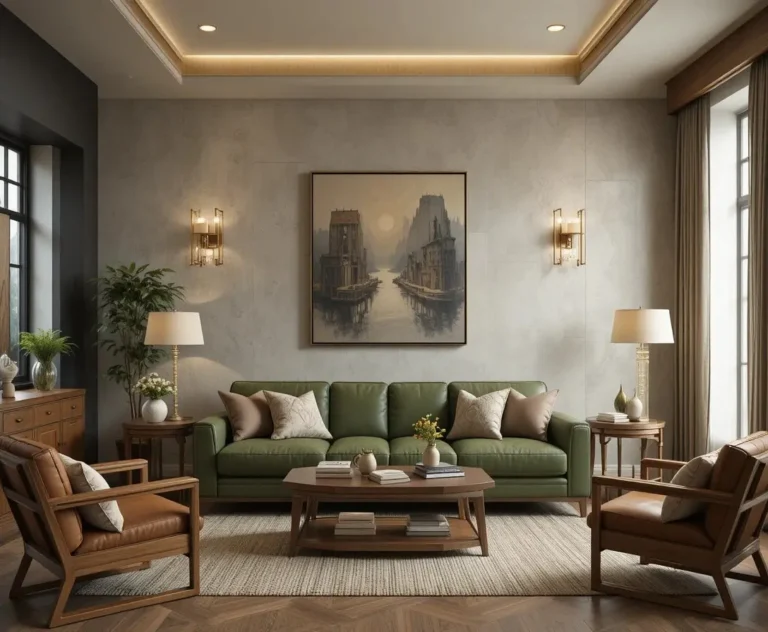
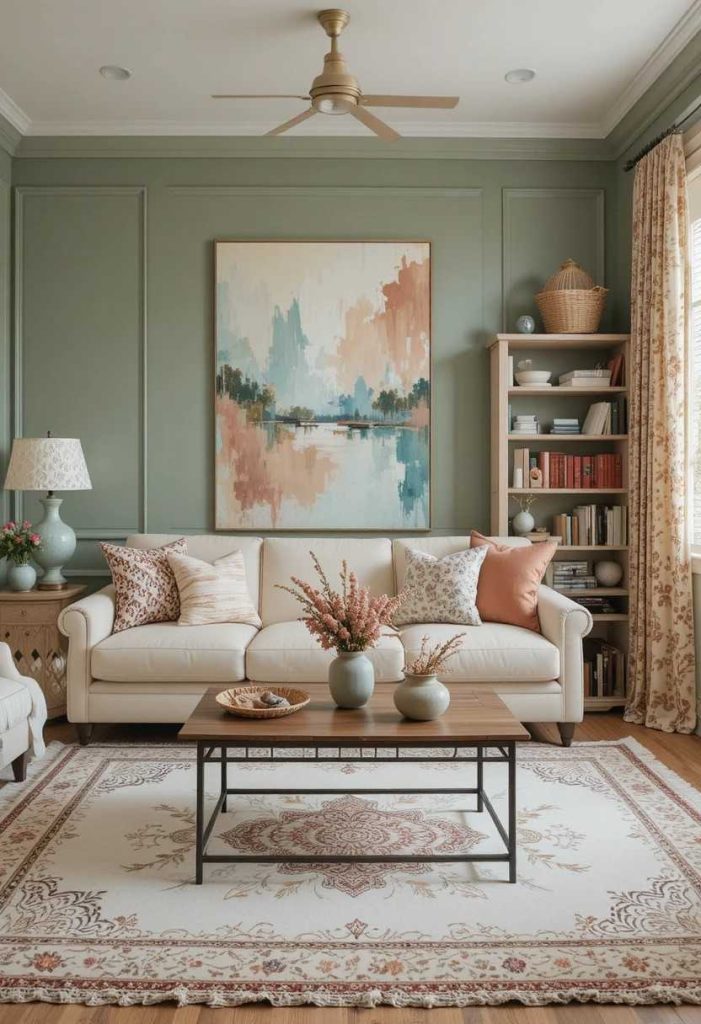
15. DIY Vintage Market Vignette: Curating a Collected Corner for Under $30
Budget: $15–$35 | Difficulty: Beginner | Time: 1 afternoon (shopping and styling)
The ‘collected corner’ a carefully assembled arrangement of vintage objects, natural materials, and personally meaningful pieces that occupies a specific area of the living room is one of the most loved and most saved living room aesthetic categories on Pinterest in 2025 and 2026. As one design source notes: ‘The mood for 2026 is moving away from overly polished, showroom-perfect schemes in favor of homes that feel collected over time a pre-loved, patented piece adds instant depth and warmth to a space that you can’t pull out fresh from a box.’ The vintage market vignette is the most direct and most budget-accessible route to achieving this quality.
Style tip: Develop a specific colour brief before visiting any vintage market for example, ‘warm tones only: cream, terracotta, warm wood, amber glass, brass.’ Apply this brief without exception to every potential purchase. A vintage vignette assembled from objects in the same three-colour palette will look designed regardless of how randomly the individual pieces were sourced.
16. DIY Stencilled Floor Design: Transforming Tired Floors Without Replacing Them
Budget: $20–$45 | Difficulty: Intermediate | Time: One weekend
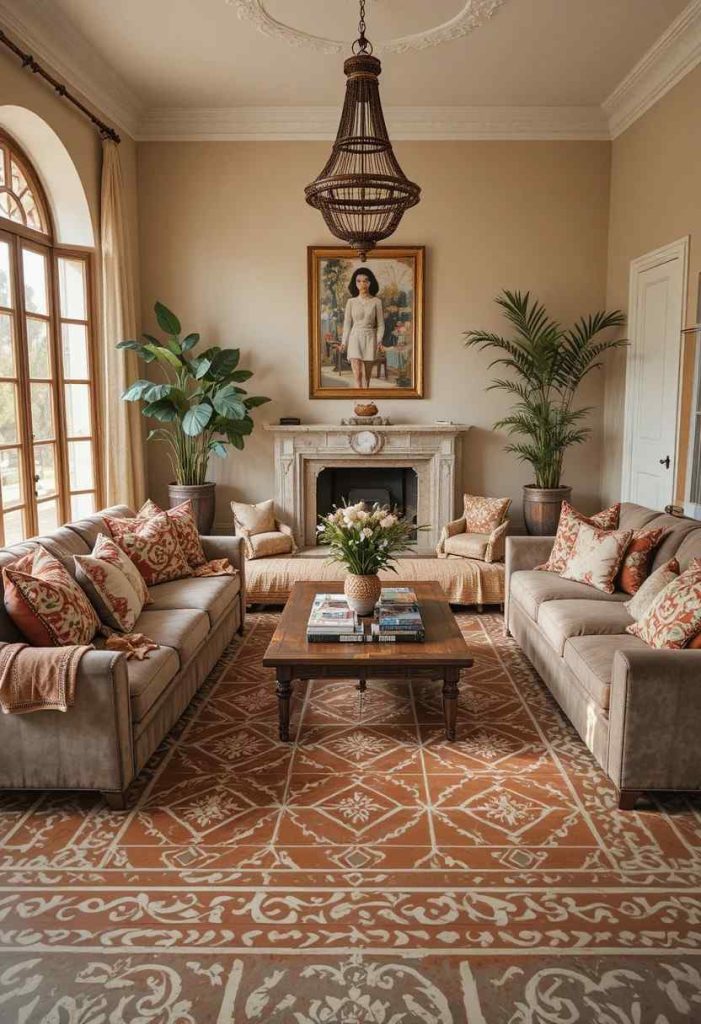
A stenciled floor design typically applied in floor paint over an existing hard floor surface to create the visual effect of tile, pattern, or geometric decoration is one of the most dramatically transformative DIY living room projects available, capable of changing the entire character and apparent quality of a room at a material cost of under fifty dollars. Where the underlying floor is sound and structurally adequate but visually uninspiring plain concrete, old painted timber boards, dated vinyl, or laminate in a characterless finish a stencilled design applied over the existing surface creates a new visual reality that reads, from standing height, as a genuine decorative floor installation.
Style tip: When stencilling a floor pattern in a small or medium-sized living room, use the pattern as a room-defining element rather than covering the entire floor stencil only the central area of the living room within the footprint of the rug, leaving the floor visible at the periphery in its original colour. This creates a rug-like effect using paint, at a fraction of the cost of an actual rug.
17. DIY Doily and Lace Lampshade: The 2026 Trend That Costs Under $5
Budget: $3–$12 | Difficulty: Beginner | Time: 20–30 minutes
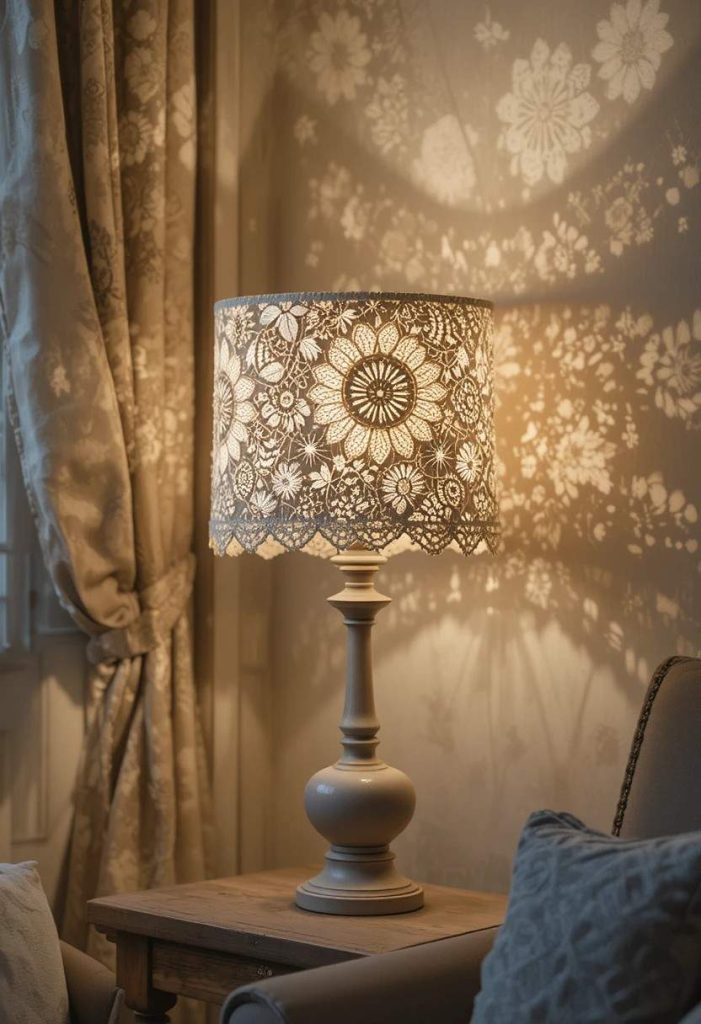
Doilies the delicate circular crocheted or lace textiles traditionally associated with antimacassars and Victorian sideboard decoration are experiencing one of the most unlikely design revivals in contemporary interior design. As a direct trend source confirms: ‘Lace trim, eyelet fabric, and vintage doilies are appearing on lampshades, throw pillows, and curtain panels Pinterest named this one of the biggest decor trends of 2026.’ The doily lampshade, in particular, represents one of the simplest, quickest, and least expensive DIY living room transformations possible: a plain drum lampshade becomes a cottage-inspired, distinctively characterful light fitting in under thirty minutes.
Style tip: After completing the doily lampshade, take a photograph of it lit in a darkened room to capture the shadow patterns it projects on the surrounding wall and ceiling. The shadow photography is one of the most beautiful and most-saved DIY project images on Pinterest and provides excellent content for any home decor social media presence.
18. DIY Braided Rug: Handcrafted Floor Texture From Repurposed Fabrics
Budget: $0–$20 (using fabric scraps) | Difficulty: Beginner–Intermediate | Time: Several evenings
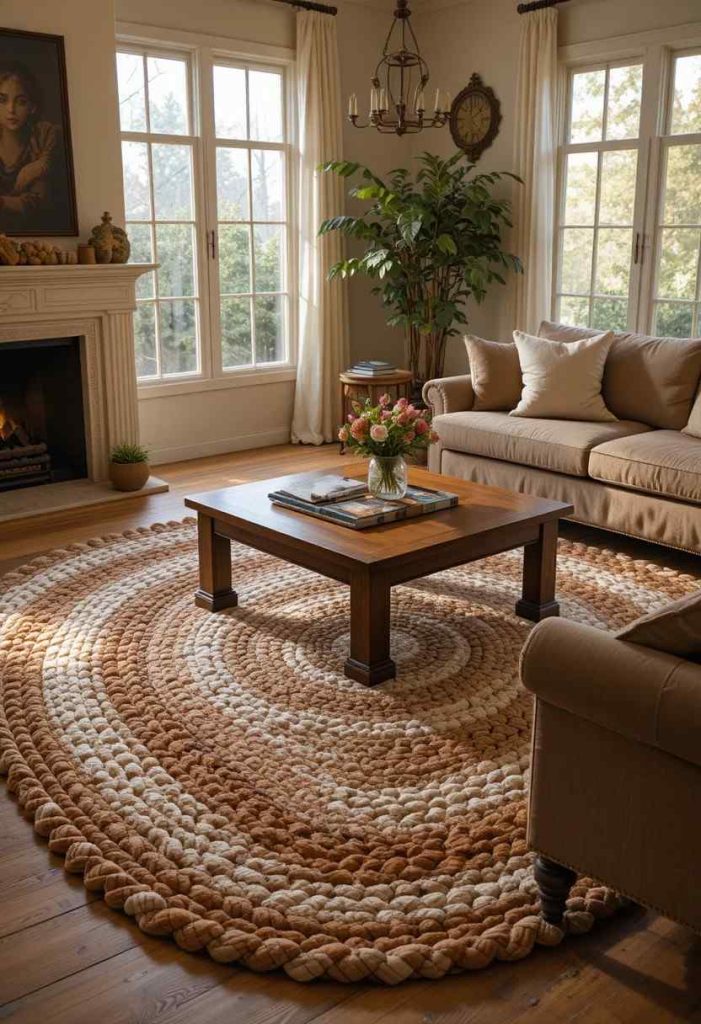
The braided rug has returned to mainstream interior design after years of being overlooked part of the broader movement toward handcraft, natural materials, and visible human effort that defines the most compelling DIY home decor of 2025 and 2026. A braided rug made from strips of repurposed fabric old clothing, worn-out bed linen, curtain remnants, t-shirts transforms textile waste into a genuinely beautiful floor covering that adds colour, texture, and hand-crafted character to the living room at virtually zero material cost. The technique is straightforward enough for complete beginners and meditative enough to be enjoyable as an evening craft project over multiple sessions.
Style tip: Keep the fabric palette of a DIY braided rug to a maximum of four colours for the most cohesive, designed result more colours create a scattered, confused visual character, while two to four colours create a rug that reads as intentionally designed. Cut all fabrics to the same width for the most uniform, professional-looking braid.
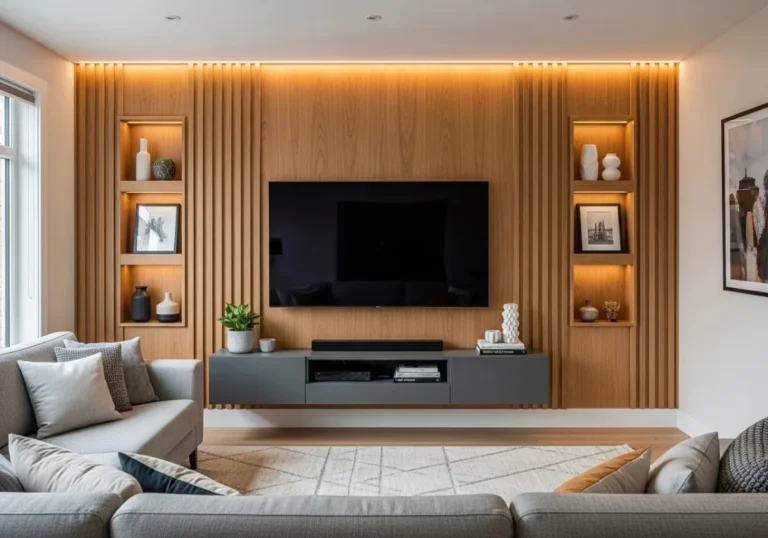
19. DIY Floating Shelf Vignette: Designer Styling on a Single Shelf
Budget: $15–$40 (including shelf and accessories) | Difficulty: Beginner | Time: 2–3 hours
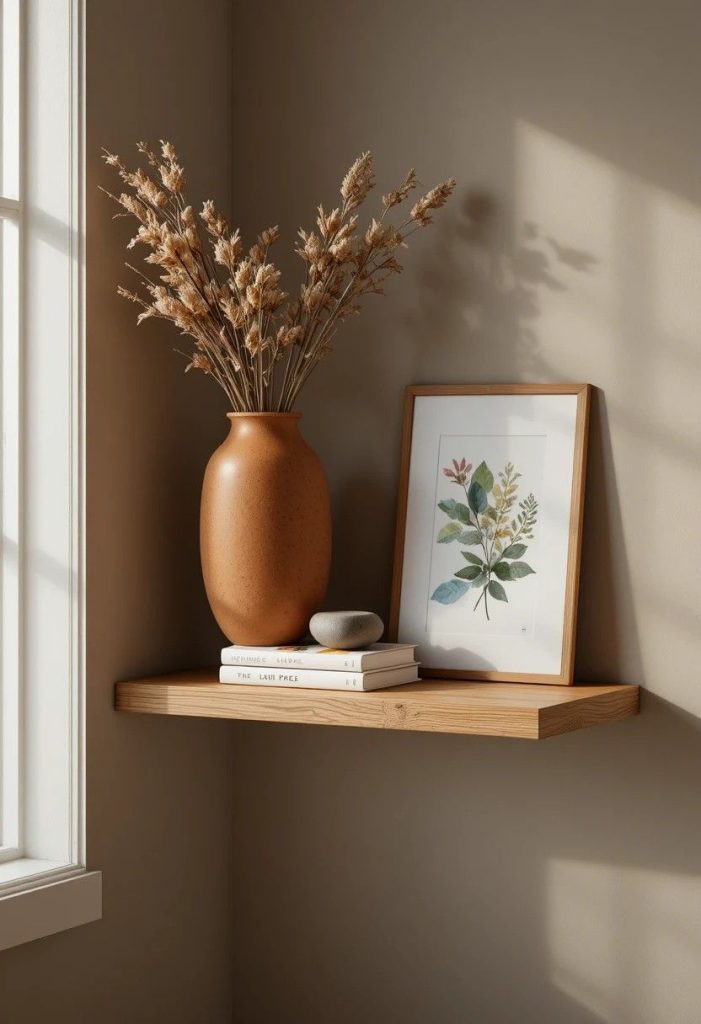
A single well-positioned floating shelf, styled with genuine design intention, can contribute more to a living room’s visual quality than a full wall of furniture and accessories assembled without compositional thought. The floating shelf vignette a carefully curated arrangement of objects on a single shelf installed at the most visually prominent available wall position distils the principles of good interior design (scale variation, material coherence, colour coordination, negative space) into a small, achievable project that produces results of immediate and measurable visual impact.
Style tip: Style a living room floating shelf with the room’s actual physical objects before purchasing anything specifically for the shelf gather every potentially relevant item from around the room and arrange them on the floor in front of the empty shelf. This inventory-first approach often reveals that the room already contains everything needed for a beautiful shelf composition, and prevents impulse purchases of objects that duplicate what is already present.
20. DIY Curtain Panel Embellishment: Transforming Basic Curtains Into Bespoke Pieces
Budget: $10–$25 | Difficulty: Beginner | Time: 1–2 hours
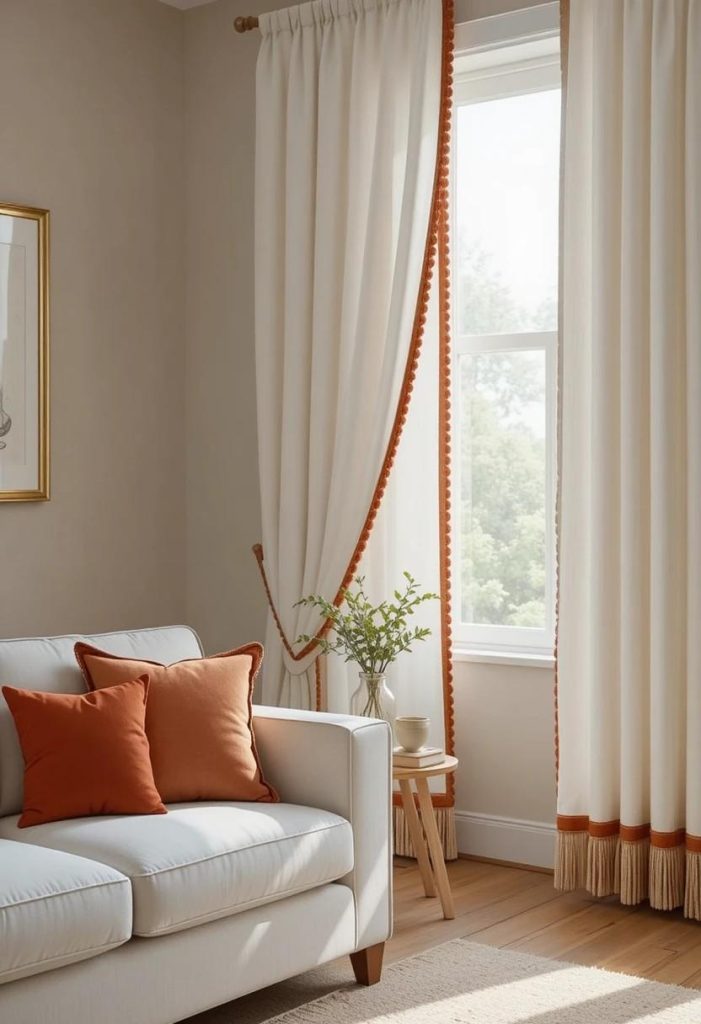
Plain curtain panels the standard white or cream offerings from IKEA and budget home stores provide excellent coverage and light control but offer nothing distinctive in terms of visual character or design personality. A small number of carefully chosen embellishments, applied to existing curtain panels in under two hours, transforms these utilitarian window coverings into bespoke textiles of genuine visual interest and personality. The embellishment techniques require no sewing machine and minimal craft skill: iron-on fabric tape bonds trims and ribbons to curtain fabric without sewing; fabric glue adheres heavier embellishments; and hand-stitching with basic running stitch adds decorative detail with satisfying simplicity.
Style tip: Add curtain embellishments only to the areas of the curtain that are visible when the curtain is in its normal position typically the leading edge (facing the window centre) and the hem. Embellishments on hidden areas (the wall edge, the upper section gathered behind the tieback) waste materials and effort on areas that are never seen.
21. The Complete DIY Living Room: Combining All 21 Ideas for a Full Transformation
Budget: $150–$250 for all 21 ideas in combination | Difficulty: All levels | Time: Several weekends
The twenty-one DIY living room projects in this guide each address a specific aspect of the living room’s visual quality its walls, its floor, its furniture, its accessories, its textiles, its lighting, and its botanical and natural material presence. Applied individually over a period of weeks or months, each improves the room’s character and visual quality incrementally. Applied in combination in a thoughtful sequence that begins with the highest-impact structural interventions (the colour-drenched accent wall, the picture frame moulding, the floor stencil) and progresses through the medium-impact furniture and textile projects (the coffee table upcycle, the printed cushion covers, the curtain embellishment) to the detail-level accessory and styling projects (the clay accessories, the botanical arrangement, the shelf vignette, the vintage market corner) they produce a living room of considerable visual quality, genuine personal character, and deeply satisfying handmade soul.
Final style tip: Photograph the living room from the doorway at the beginning and at the end of the complete DIY transformation. The before-and-after comparison is both personally satisfying and one of the most high-performing content formats on Pinterest and home decor social media share it with a full project breakdown and budget total for maximum engagement and saves.
Frequently Asked Questions About DIY Living Room Decor
Which of these DIY projects is the highest impact for the lowest cost?
The picture frame wall moulding (Idea 1) delivers the greatest visual transformation per dollar spent it costs twenty to forty dollars in materials and transforms a flat, characterless wall into something that reads as a bespoke, architecturally detailed surface. The closest second is the bookcase back panel painting (Idea 10), which costs the price of one tin of paint and transforms a piece of furniture already in the room into one of the room’s strongest design features.
Which projects are suitable for renters who cannot damage walls?
The fully renter-safe projects in this guide are: the bookcase styling transformation (uses no wall fixings), the clay accessories (freestanding), the botanical arrangement (freestanding), the tray styling (freestanding), the vintage market vignette (freestanding), the braided rug (floor-based), the ottoman upcycle (freestanding), and the curtain embellishment (applied to portable curtains). The floating shelf can be installed with Command strips rated for the appropriate weight in most rental contexts. The limewash wall and picture frame moulding require painting and should only be undertaken with explicit landlord permission.
What is the best first DIY project for a complete beginner?
The three best first projects for beginners, in order of ease and impact, are: (1) the bookcase styling transformation requires no tools, no materials purchase in most cases, and produces immediate visual improvement; (2) the clay accessories requires only air-dry clay and a few hours, produces beautiful results regardless of skill level, and provides a satisfying introduction to the handcraft aesthetic; and (3) the dried botanical arrangement requires only a vase and botanical stems, takes thirty minutes, and produces a result that immediately improves the room’s character.
How do I make sure my colour palette is cohesive across all DIY projects?
Before beginning any project, collect physical samples of your room’s existing colours a paint swatch of the wall colour, a fabric sample from the sofa, a photograph of the rug. Use these as references for every subsequent colour decision. Apply the three-colour rule: identify one dominant colour (walls, largest surfaces), one secondary colour (sofa, large textiles), and one accent (accessories, cushions). Every project decision should either use one of these three colours or a tone so close to one of them that it reads as the same family. Test every paint and fabric purchase against the reference samples before committing.
How do I photograph DIY living room decor for Pinterest?
The best performing DIY living room photography on Pinterest shares five characteristics: natural light (shoot during the day with the main window light source to one side of the frame, not directly facing the camera); a clean, uncluttered background (remove items that are not part of the intended scene before shooting); a portrait orientation (2:3 ratio performs best on Pinterest’s vertical-format feed); a close-up detail shot alongside the wider room shot (showing the texture and craft quality of the DIY project); and a descriptive, keyword-rich pin description that includes the project name, materials cost, and time required.
Conclusion: The Most Beautiful Living Rooms Are the Ones You Made Yourself
The living room that is made rather than purchased has a quality that no amount of money spent in a design shop can replicate the quality of genuine personal investment, of hours given, of decisions made, of materials handled. When the abstract canvas above the sofa was painted on a Sunday afternoon with colours mixed to match the room’s palette; when the bookcase was spent an entire weekend reorganizing, painting the back panels, and curating the collection; when the macramé wall hanging was knotted through many evenings of learning and practice these objects are not just decorative. They are evidence of care.
The twenty-one projects in this guide are the tools for creating this kind of room. They are all achievable. They are all genuinely beautiful when executed with the principles of good design colour palette consistency, appropriate scale, complete finishing, and generous negative space. And they collectively produce a living room that looks, to every visitor, like the result of a professional interior design engagement rather than a series of weekend craft projects.